Two ways to mend a warp end
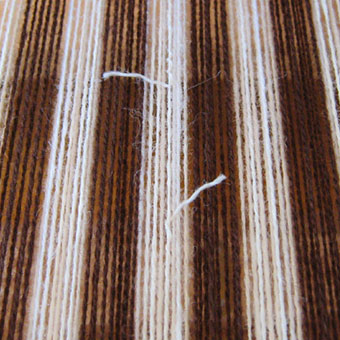
You see a warp on the way to breaking, or there is a knot coming near the heddles. You will soon have to mend it.
Here I'm offering two methods to do it.
Bergdala Spinnhuson weaving, tricks and tips |
|
|
|
Two ways to mend a warp end
You see a warp on the way to breaking, or there is a knot coming near the heddles. You will soon have to mend it.
|
|
|
I will use a repair end of a different colour, to make things more easy to see.
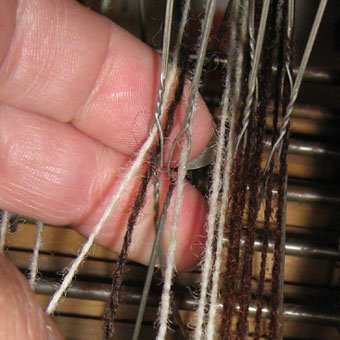
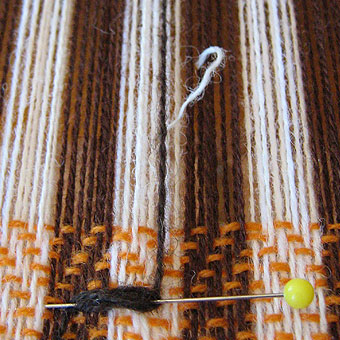
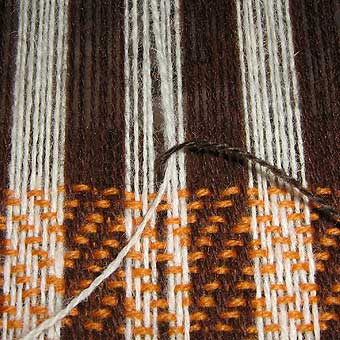
Take the repair end from the back, through the same heddle as the worn end. Do NOT remove the worn end yet! (see the picture below) Take the repair end through the correct dent in the reed, attach it with a pin. Hang the cone/spool over the back beam. If it is too light, weight it with something so that the tension gets right. If the cone is too heavy, let the cone sit on the floor and attach a weight to the end at a higher level. Weights can be fastened with s-hooks, a clothes pin or just a lark's head. |
|
||
|
| ||
|
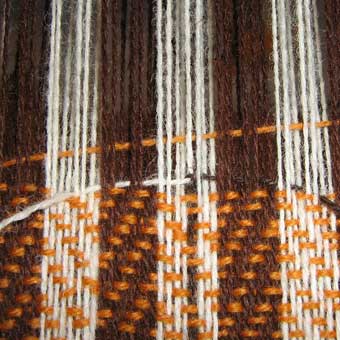
Now weave a few picks with both warps in place. You may have to manipulate the old end some, to
make sure that it stays in the correct place. Weave a couple of centimeters in this way - I made
10 picks (see picture on the right).
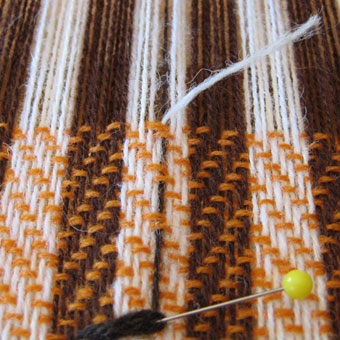
When the repair is long enough, cut the old end. Take it back, out of reed and heddle, and let it hang over the back beam until it is long enough to be brought forth into the cloth again. Repairing the end this way eliminates the need for needleweaving afterwards. In my opinion the result gets better if the ends are not trimmed until after wet finishing. |
| ||
|
This method can be used even if the old end has broken off, but then it requires more
manipulating by hand. I think it is worth the extra time, compared to repairing/needelweaving
after cutting off.
The second method works best if you have the same yarn (and colour) in both warp and weft.
Take the repair end through heddle and reed. (With this method you have only one end in the heddle.) Cross the repair end and the broken end. Take both ends back in the shed, one in each direction. (This repair will look like an ordinary weft "repair") The first two-three picks can be tricky, as it is difficult to pin the repair end to correct tension. Some patience usually will do the trick - and you won't have to do any needleweaving afterwards! |
|||
|
|
||
|
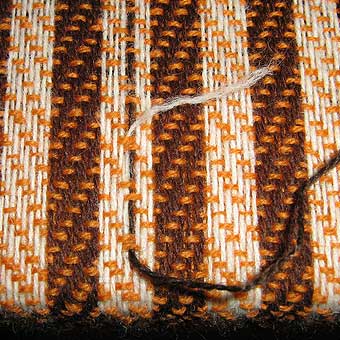
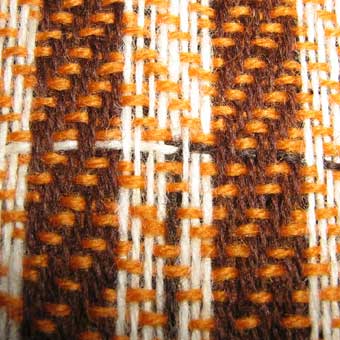
This is what the two repair methods will look like, after a couple of centimeters:
|
|||
|
|
||
|
Bergdala Spinnhus Bergdala 27 360 51 Hovmantorp Sweden kerstin@bergdalaspinnhus.com www.bergdalaspinnhus.com | |||