|
|
|
To weave double width
Do you want to weave wider than your loom allows you to? The you can weave double width.
I got a question: how can one make sure that the structure gets correct at the fold, when weaving double width?
As usual, my answer was "make a paper weaving - it is a very good method".
Here is how:
|
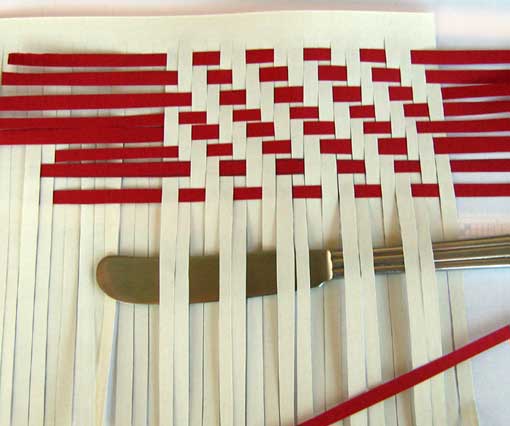
Let us start with a common 4-shaft 2/2 twill.
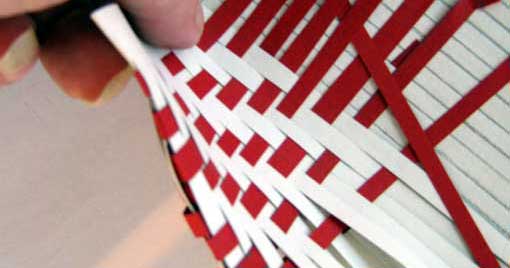
I use a "selvage" on one of the papers - here the white. It is easier to plait if using a
"pick-up stick".
What you now see it the right side of your cloth, when un-folded. The fold will be (will have been) somewhere
in the middle.
Make the paper weave big enough that you are sure that you have at least one report of the structure on each
side of your fold line.
|
|
|
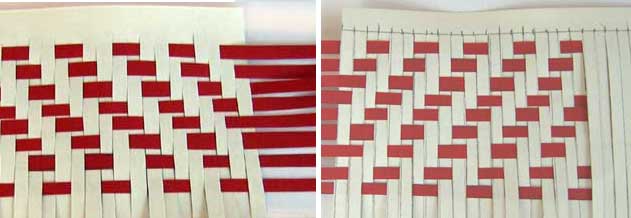
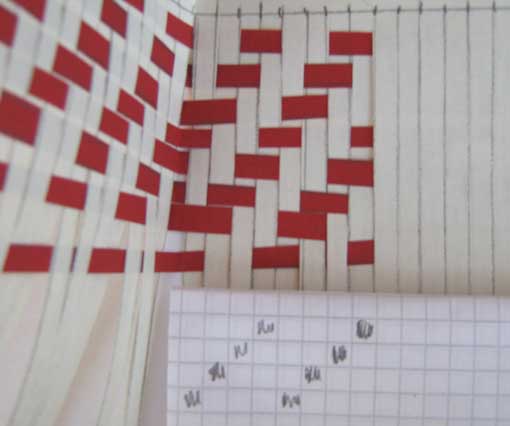
Here is the right side (left) and the wrong side (right).
Someone always objects: but why plait? Why not just make a drawdown on paper? (And, besides, everybody
knows a 2/2 twill, right)?!?
Yes, but... here is the point: The plaiting (as the fabric, once it is woven) has two sides. And here we will
make use of that, by folding the paper weave where we want the fold to be!
|
|
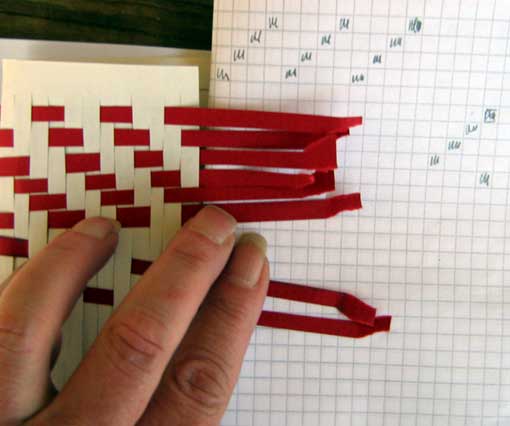
So: fold the paper weave like you will want it on the loom. Here, I am putting the fold on the left.
|
|
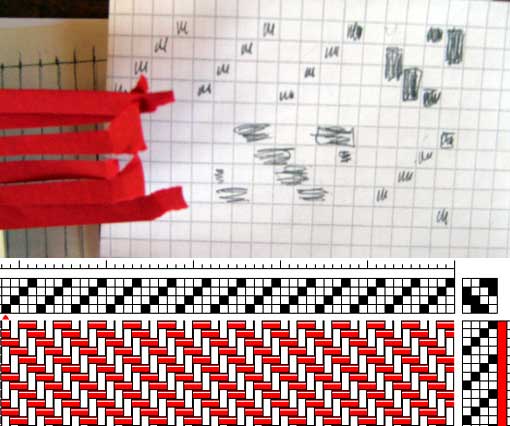
Now we can start to analyze the top layer, as you will see it on the loom. I always start with the threading,
go on with the treadling, and can then construct the tie-up.
If you don't know how to make a fabric analysis, you can read more
here. (Link will open in new window).
|
|
|
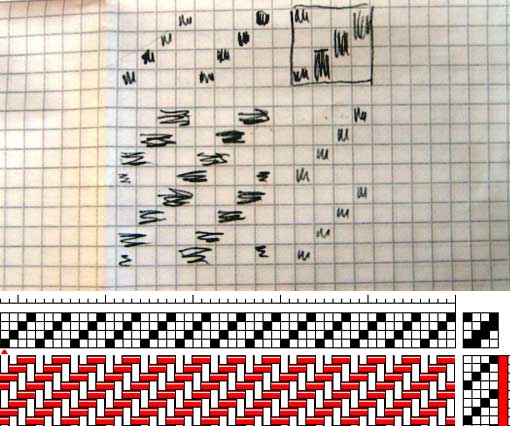
Here is the point with the paper weaving: now, you can unfold it, and analyze the bottom layer. What you see
is the top side of the bottom layer, as it sita on the loom. Take care that the analysis ends on the last
warp end of the bottom layer, before the fold.
|
|
|
When done, your top layer will look like this:
Please note that all tie-ups are for sinking shed! (To convert to rising shed, just tie the
unmarked squares.)
|
|
|
Next, your bottom layer will look like this:
Please note that all tie-ups are for sinking shed! (To convert to rising shed, just tie the
unmarked squares.)
|
|
|
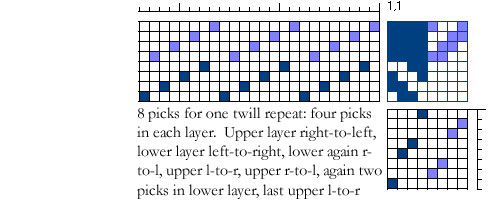
Now the two threadings have to be combined. To begin with, I let the lower layer be threaded on the 4
back shafts (numbered 1-4 according to Swedish conventions). The upper layer will be threaded on the 4
front shafts (5-8, in Swedish books). The tie-ups are entered, for the lower layer in the top right corner
(according to Swedish conventions: shafts 1-4, treadles 1-4). For the upper layer the tie-up is placed
in the lower left corner (shafts 5-8, treadles 5-8). To make the upper layer weavable, the lower layer
has to be tied to sink - herefore the whole upper left corner is marked for sinking.
|
|
|
The treadling order is very important when weaving double width. There are eight shuttlings required
to make the four picks in one treadling repeat over the whole width, and they have to be in the correct
order. Here, we make the first pick (the upper layer), from right to left. Now go round the fold, make the first
pick in the bottom layer, left to right. The weft now exits to the right, from the lower layer - therefore the
next pick has to be in the lower layer, from right to left. Going round the fold, the fourth pick is in the
upper layer, left to right. These four shuttlings constitute two complete picks over the whole width.
|
|
|
If you find the threading and treadling a bit complicated, as I do, you can shuffle them. Most weaving
software will help with that.
But - it is always nice to know how things work, right?
Think like this: cut your threading, including the tie-up into strips, one per shaft. Now you can move
around the threading until it looks easier to handle. The tie-up will change automatically. (It is not always
possible to make the threadings as easy as one would like to...)
When that is done, do the same for the treadling, still including the (new) tie-up.
The result can look like this (the letter t means top layer):
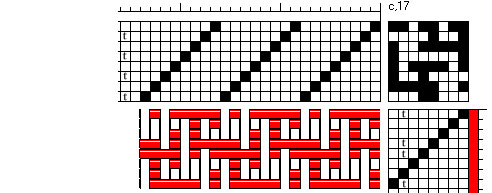
Several weaving softwares can help with making double width diagrams. You just enter the structure you want
and ask for "double width" - and immediately you have a complete diagram. I am sure it works, but
I always like to understand how things work!
- Paper weaving is a good method (in my opinion...) especially for somewhat more complicated structures.
Therefore there is also a part 2, with a lace example.
|

